Hey guys.
You’re packing down after a session, and you spot it what to do now. How to do a Kite Canopy Repair?
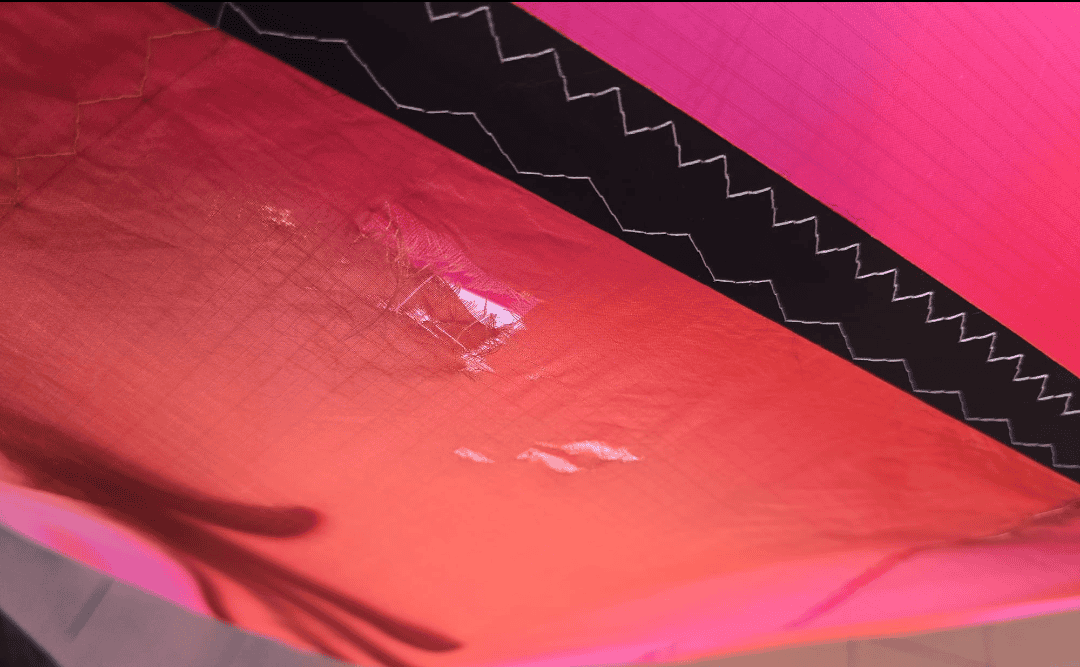
A rip in the canopy. Could be a tiny pinhole from a shell fragment on the beach. Could be a proper gash from a lines snap or a bad crash into something sharp.
Either way — your stomach drops.
Here’s the thing though: a kite canopy tear repair is one of the most fixable problems in kitesurfing. The right tape, the right technique, fifteen minutes of your time. Done properly it’s a permanent repair that’ll outlast the kite.
Done wrong it peels off mid-session and turns a small rip into a big one.
So let’s do it right.
Note: This post contains affiliate links. Full Disclosure.
First — How Bad Is It Actually?
Before you grab anything, take a proper look at the damage. Not a panicked glance — actually assess it.
There are four levels of canopy damage and they need different approaches:
Level 1 — Pinhole or micro-tear (under 5mm) Usually from a shell, grit, or stitching stress. Barely visible. Easy fix, one small patch, ten minutes.
Level 2 — Clean tear (5mm to 5cm) The most common damage. Usually from sharp contact — rocks, a fin, a kite hook. Clean edges, fixable at home with standard tape. This is what we’ll cover in the most detail.
Level 3 — Ragged or L-shaped tear (5cm+) Bigger damage, often from a hard crash or lines under load. Still fixable at home but needs more prep and a larger patch on both sides.
Level 4 — Panel damage or seam failure A large section of canopy blown out, or the stitching along a seam has let go. This one’s worth a professional look — structural seam repairs need the right thread and tension to hold under flying load.
Got your level? Good. Let’s get into it.
The Right Tape for the Job — This Matters More Than You Think
Most people grab whatever tape is nearby. That’s how you end up with a repair that peels off after two sessions.
Canopy fabric is either ripstop nylon, ripstop polyester, or on high-end 2026 kites, Aluula composite. Each needs a different tape.
For ripstop nylon and polyester canopies: Tear-Aid Type A is the industry standard. It’s flexible, UV resistant, bonds properly to fabric, and stretches with the canopy under load. Keep a roll in your repair kit at all times — full stop.
For Aluula canopies: Standard Tear-Aid won’t bond properly to Aluula’s surface coating. You need Aluula-specific repair tape — your kite brand should have it, or you can get it direct from Aluula. Using the wrong tape here is a waste of time.
For trailing edge and Dacron sections: Dacron repair tape or self-adhesive Dacron patch. The leading edge and strut junctions are usually Dacron — different material, different tape.
What NOT to use: Duct tape. Gaffer tape. Electrical tape. Any tape that isn’t specifically made for fabric repair. These don’t flex with the canopy, they trap moisture underneath, and they leave a sticky residue that’s a nightmare to clean off later.
Tools You’ll Need
Nothing exotic. Most of this is already in your bag if you’ve built a proper repair kit.
- Tear-Aid Type A (primary repair tape)
- Scissors — sharp ones, not kitchen scissors
- Isopropyl alcohol (surface prep)
- Clean cloth or paper towel
- Permanent marker
- Ruler or tape measure
- Flat hard surface to work on
How to do a Kite Canopy Repair — Step by Step
Step 1 — Clean and dry the area completely
This is the step that determines whether your repair lasts one session or three seasons.
Any salt, sand, sunscreen, or moisture under the patch and it won’t bond properly. Wipe the area around the tear with isopropyl alcohol — at least 5cm in every direction from the damage. Let it evaporate fully. Don’t touch the cleaned area with bare fingers after this — skin oils contaminate the surface.
If the kite is damp from a session, let it dry completely first. An hour minimum, overnight if you can. Patching a wet canopy is wasting your time and your tape.
Step 2 — Trim any loose threads or flaps
Any loose fibers hanging off the tear edge need to come off. Use sharp scissors to trim cleanly. If there’s a flap of fabric that’s lifted, cut it flush rather than leaving it sticking up under the patch — it’ll create a bubble and the repair will peel from that point.
Step 3 — Measure and cut your patch
The patch needs to extend at least 2cm beyond the tear in every direction. For a 3cm tear that means a patch roughly 7cm wide and 7cm tall minimum.
Cut it with rounded corners. Always. Sharp corners are where peeling starts — the corner lifts first, then the whole patch follows. This single habit extends repair life dramatically.
For Level 2 and above tears, cut two patches — one for each side of the canopy. The sandwich repair is always stronger than a single-sided patch.
Step 4 — Apply the first patch
Peel the backing slowly — these tapes can be fiddly to handle. Start the application from one end of the tear, working outward. Press down from the center out to the edges to avoid air bubbles.
Once it’s on, press firmly with your thumb along the entire patch — especially the edges. Give it some heat if you have it. A hairdryer on low from about 15cm away activates the adhesive and dramatically improves bond strength. 30 seconds is enough.
Don’t stretch the patch as you apply it. If it goes on under tension it’ll want to peel back off.
Step 5 — Flip and apply the second patch
For Level 2 and above, flip the kite and apply the second patch directly over the first from the other side, aligned as closely as possible. Same technique — rounded corners, center outward, press firmly, hairdryer finish.
The two patches grip the canopy between them like a clamp. This is what makes the repair hold under flying load.
Step 6 — Cure time
I know you want to get back on the water. Give it a minimum of 2 hours at room temperature before you inflate. Overnight is better. The adhesive needs time to fully bond to the fabric — launching too soon is the most common reason repairs fail.
Step 7 — Pressure test before you fly
Inflate the kite fully and check the repair area. Look for any edge lifting or bubbling. Press along the patch edges with your thumb. If it’s all flat and solid, you’re good. If an edge is lifting, deflate, press it back down firmly, hit it with the hairdryer again, and give it more cure time.
Repairing Tears Near the Leading Edge or Struts
Tears near the junction between the canopy and the leading edge or struts need a bit more care because this area flexes more under load.
Don’t cover the seam stitching with tape if you can avoid it. The stitching needs to stay accessible — if the seam starts to go later you want to be able to reinforce it without fighting through tape.
Use a slightly larger patch in these areas — the extra surface area compensates for the increased flex stress.
Check the stitching while you’re in there. If the canopy tore near a seam, the stitching around it has taken stress too. If any threads are fraying or the stitching looks loose, mark it and get it professionally re-stitched before it becomes a seam failure. Catching it now is a 15-minute job for a sail repair shop. Ignoring it means a much bigger repair later.
Repairing Aluula Canopies — Different Rules
If you’re riding an Aluula kite — North Orbit, F-One Trigger, or similar — the repair process is the same but with two important differences.
Only use Aluula-specific tape. Standard Tear-Aid will not bond properly to the surface coating long-term. It might stick initially but it’ll peel under UV and flying load. Get the right tape from Aluula directly or from your kite brand’s repair kit.
Be more careful with heat. Aluula’s composite structure is more sensitive to heat than standard ripstop. Skip the hairdryer and use firm hand pressure for longer instead — two minutes of firm pressing does the job without risking the material.
Preventing Canopy Tears
Most tears I see are preventable. A few habits make a real difference:
Check your flying area before launching. Rocky beaches, shell fragments, old wire — these are what cause the majority of small canopy tears. Two minutes scanning the area where your kite will land saves a lot of repair work.
Don’t leave it parked on sharp surfaces. Your kite sitting on a beach full of shells is grinding small holes into the canopy every time the wind moves it. Use a ground mat or park it on sand you’ve checked.
Store it properly. UV breakdown weakens canopy fabric over time, making it more vulnerable to tearing. Store in a bag, out of direct sun. Check the kite maintenance calendar — there’s a canopy inspection section in there.
Inspect after every session. You don’t need to lay it all out every time — just run your hands along the canopy while you’re rolling it. You’ll feel a small tear before you see it. Catch it small, fix it small. Let it go and you’re cutting a larger patch next time.
When to Take It to a Professional
Home repairs are great for Level 1 and 2 damage. But some things are worth paying a professional for:
- Seam failures — structural stitching needs the right thread, right tension, and right needle for the material. Get it wrong and it fails under load.
- Tears through reinforcement panels — the load patches around the bridle attachment points are structural. A tape patch here isn’t enough.
- Multiple tears across one panel — if a panel has taken a lot of damage, the whole panel may need replacing. A kite repair shop can do this properly.
- Any damage you’re not confident repairing — if you’re unsure, ask. A professional repair is cheaper than a new kite.
Most kite brands have authorised repair centres and many sail repair shops will work on kites too. A quick Google for “kite repair [your city]” will usually find someone.
Quick FAQ
Can I use Tear-Aid on a wet kite?
No. The adhesive won’t bond properly to wet fabric. Dry it fully first — even if that means waiting until the next day. A repair done right once beats a repair done twice.
How long does a kite canopy tear repair last?
Done properly with the right tape, years. I’ve got kites with three-season-old Tear-Aid patches that are still holding perfectly. The key is clean prep and full cure time before flying.
My tear is right at the edge of the canopy — is that harder to repair?
Yes, edge tears are trickier because the patch can’t overlap onto both sides evenly. You’ll need a larger patch and extra attention to the edge itself. If the tear has reached the seam stitching, get it looked at professionally.
Can I repair a canopy tear in the field?
For small tears, yes — this is exactly what that Solarez tube or Tear-Aid strip in your bag is for. A quick field patch will get you through the rest of the day. Just redo it properly when you get home — clean prep, proper patch, full cure.
What if the repair keeps peeling off?
Almost always a prep issue. The surface wasn’t clean enough, or you didn’t allow enough cure time, or you used the wrong tape for the canopy material. Strip it off, clean thoroughly with isopropyl alcohol, use the right tape, and give it overnight to cure.
A canopy tear isn’t the end of your kite.
It’s a fifteen-minute job with the right tape and a bit of patience.
Clean it. Patch it. Let it cure. Fly it.
Your kite will thank you for it.
Ride hard. 🤙
Repaired a canopy tear with a technique I didn’t cover? Drop it in the comments — always good to hear what’s working out there.

I’ve been riding since 2009 — mostly Red Sea and Mediterranean, a season in Tarifa, a few trips to Brazil. I started this site because the maintenance advice online was either vague or wrong, and I got tired of watching riders show up with gear that should have been retired two seasons ago. I fix what other people ignore.