Hey guys.
You pump up, everything looks fine. An hour later you’re back on the beach with a soft leading edge and no obvious explanation. The bladder checked out. The canopy is intact. The problem is the valve.
A leaking kite valve is one of the most misdiagnosed problems in kitesurfing — mostly because riders jump straight to patching the bladder without checking the valve first. If your kite loses pressure consistently and the bladder shows no pinhole, the valve is where to look.
The good news: most leaking kite valve problems are fixable at home in under an hour with basic materials. Here’s exactly how.
Note: This post contains affiliate links. Full Disclosure.
Types of Kite Valve Leaks — Diagnose First
Not all leaking kite valve problems are the same. The fix depends on where the leak is coming from. Getting this wrong wastes time and materials.
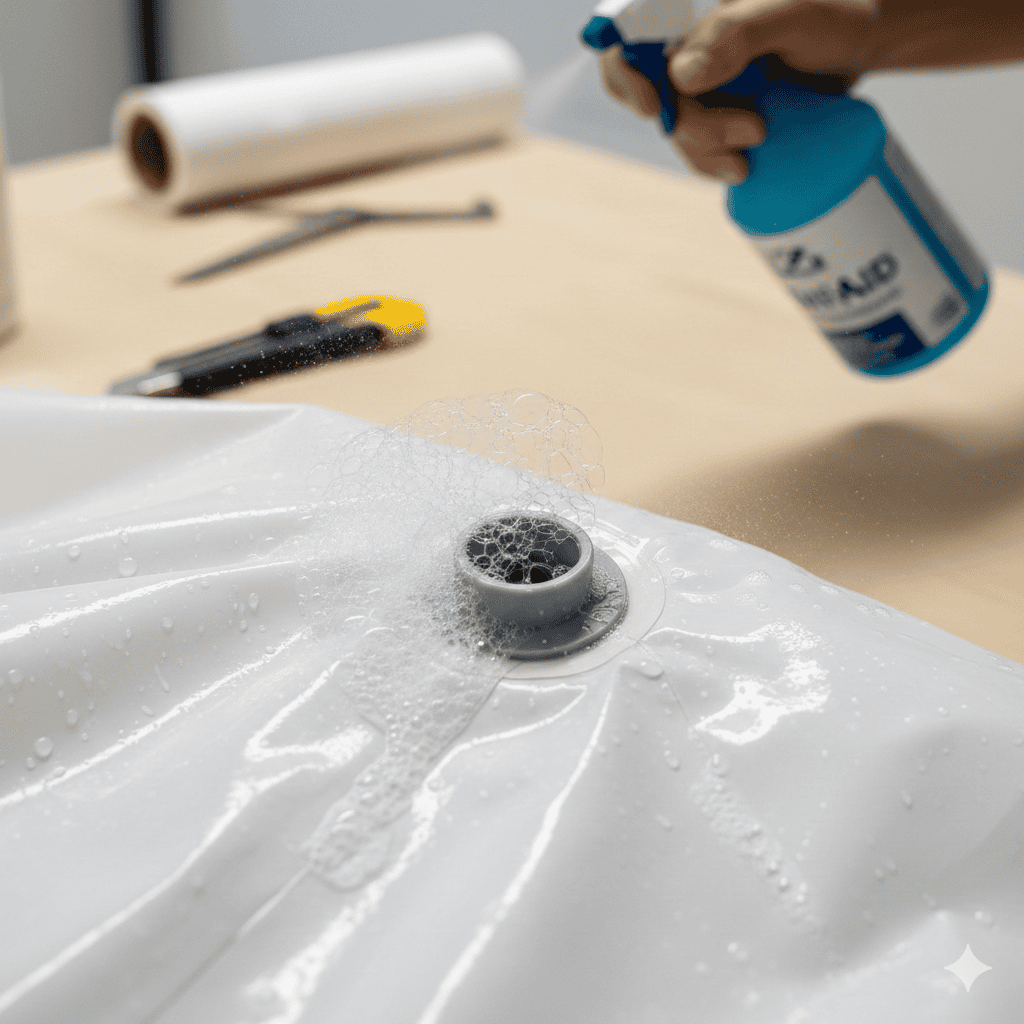
Valve base delamination — the most common leaking kite valve issue. The bond between the valve body and the bladder material has failed. Air escapes around the outside of the valve, not through it. You’ll see bubbles forming in a ring around the valve base when you test with soapy water.
Internal seal failure — the one-way mechanism inside the valve has failed or is contaminated. Air passes back through the valve in the wrong direction. Bubbles appear at the valve cap or inside the valve opening, not at the base.
Sand or grit contamination — grit in the valve threads or mechanism is preventing the valve from sealing properly. The valve looks fine but won’t hold pressure. Common after beach sessions where the valve was left open.
Cracked valve body — physical damage to the plastic valve housing. Usually visible on inspection. Requires full valve replacement.
Knowing which type of leaking kite valve you’re dealing with takes two minutes and determines everything that follows.
What You Need
- Tear-Aid Type A — for reseating valve base
- Isopropyl alcohol wipes — surface prep
- Universal replacement valve — if the valve needs replacing
- Spray bottle with soapy water — leak diagnosis
- Clean cloth
- Warm fresh water — for cleaning sand contamination
- Scissors
The repair kit guide covers the complete toolbox if you’re building yours out properly.
Step 1 — Locate the Leak Precisely
Inflate the kite partially and spray soapy water around the valve. Watch carefully for where the bubbles form.
Bubbles around the valve base → delamination. The valve-to-bladder bond has failed. Go to Step 2a.
Bubbles from inside the valve opening or cap → internal seal failure or contamination. Go to Step 2b.
No bubbles at the valve but kite still losing pressure → the leaking kite valve diagnosis is wrong. Go back and check the bladder with the pinhole guide.
Step 2a — Fixing Valve Base Delamination
This is the most common leaking kite valve repair. The valve body is fine — the seal between valve and bladder has failed.
Remove the bladder from the kite. Clean the area around the valve base thoroughly with isopropyl alcohol — all old adhesive residue must come off completely. This is the step that determines whether the repair lasts. Any old glue, salt residue, or oil left on the surface and the new bond will fail in the same place.
Two options depending on severity:
Option 1 — Reseat with adhesive patch. If the valve is intact and just lifting at the base, use a self-adhesive valve circle or Tear-Aid Type A cut to size. Apply around the valve base, press firmly, smooth out all edges. Rounded corners — same rule as any patch repair.
Option 2 — Full valve replacement. If the valve base has fully delaminated and the material around it is damaged, a universal replacement valve is the cleaner fix. Cut out the old valve completely, clean the bladder surface thoroughly, and install the replacement according to its instructions. Replacement valves come with a much larger adhesive base than original factory fittings — the bond is usually stronger than the original.
Cure time: minimum 2 hours. Overnight if possible. Same rule as bladder repairs — don’t rush the cure.
Step 2b — Fixing Internal Seal Failure or Contamination
The valve body is intact but the internal mechanism isn’t sealing.
First — try cleaning. Rinse the valve thoroughly with warm fresh water. Work it open and closed repeatedly while rinsing to flush out any salt crystals or sand. Salt crystallises inside the valve mechanism over time and prevents the one-way seal from seating correctly. This is why rinsing your valve after every session matters — same principle as bar maintenance.
After rinsing — dry completely, reinflate, and retest. If the leaking kite valve problem is gone — contamination was the cause. A two-minute rinse after every session prevents it recurring.
If cleaning doesn’t fix it — the internal seal has failed. Most modern kite valves are not serviceable internally — the one-way mechanism is sealed inside the valve body. Once the internal seal fails, the valve needs replacing. Install a universal replacement valve using the same process as Option 2 above.
Step 3 — Reinstall and Pressure Test
Reinstall the bladder using your orientation marks — exactly the same process as the pinhole repair guide. A twisted bladder creates new problems.
Inflate fully. Leave for 2–3 hours. Check firmness. Retest with soapy water around the valve if you want confirmation.
If pressure is holding — the leaking kite valve is fixed.
The One Rule for Valve Repairs
Don’t over-tighten. It’s the instinctive response to a valve that’s leaking — crank it tighter. It makes things worse. Over-tightening deforms the seal surface and creates the exact gap you’re trying to close.
Clean first. Reseat or replace. Tighten just enough. That’s the sequence.
Preventing Valve Problems
Most leaking kite valve issues are preventable with one habit: rinsing after every session.
Salt is what causes both delamination and internal contamination. It crystallises in the valve mechanism, it works under the valve base adhesive, and it slowly destroys the bond between valve and bladder. Fresh water after every session flushes it out before it can build up.
The kite maintenance calendar has the full after-session routine — the valve rinse is in there along with everything else.
Other habits that prevent valve problems:
Keep the valve cap on when not inflating. Sand and grit entering the valve mechanism is the other main cause of contamination problems.
Never leave the kite inflated in a hot car or in direct sun. Heat expands the air inside, stresses the bladder material, and the highest stress point is always at the valve base — exactly where delamination starts.
Don’t over-inflate. The manufacturer’s recommended PSI is there for a reason. Higher pressure means more stress on the valve base seal, every session.
Quick FAQ
How do I know if my kite valve is leaking vs a bladder pinhole?
Test with soapy water. Valve leaks show bubbles at or around the valve. Bladder pinholes show bubbles somewhere along the bladder body. If you can’t find bubbles at the valve but the kite is still losing pressure, the problem is likely a pinhole — use the bladder repair guide.
Can I fix a leaking kite valve without removing the bladder?
For contamination issues — sometimes yes, if you can access the valve and rinse it thoroughly. For delamination or replacement — no. Proper surface prep requires the bladder to be out of the kite.
My valve keeps leaking after repair — what’s wrong?
Usually incomplete surface prep. Any old adhesive residue or salt contamination on the bladder surface around the valve base prevents proper bonding. Strip it back completely, clean with isopropyl alcohol, and start again. If it fails again in the same spot, the bladder material around the valve may be too degraded to bond to — full valve replacement on a clean section of material is the answer.
How long does a valve repair last?
Done properly — years. A universal replacement valve installed on a clean, properly prepared bladder surface is often stronger than the original factory fitting.
Do I need a brand-specific valve?
Universal valves work on most kites. If your brand uses a non-standard valve size or fitting, check with your dealer first. Most kite valves are a standard size and a universal replacement will fit correctly.
I’ve fixed a leaking kite valve at every level — a quick rinse that sorted a contamination issue in five minutes, and a full replacement job on a bladder where the factory bond had completely let go. Both are straightforward once you’ve diagnosed which type you’re dealing with.
The diagnosis is the repair. Get that right and the rest follows.
For the full picture on kite repairs — the complete repairs guide covers every repair you’ll ever need.
Ride hard. 🤙
Dealt with a leaking kite valve problem not covered here? Drop it in the comments.

I’ve been riding since 2009 — mostly Red Sea and Mediterranean, a season in Tarifa, a few trips to Brazil. I started this site because the maintenance advice online was either vague or wrong, and I got tired of watching riders show up with gear that should have been retired two seasons ago. I fix what other people ignore.